- 1 empty 500 mL (16.9 fl oz) PET water bottle, about 20 cm (8 in) tall, label peeled – $0 (reused)
- 1 drill bit or craft knife, 1.3 cm (1/2 in) – $4 to $6 [VERIFY], or already owned
- 1 sheet of 220-grit sandpaper – $1 [VERIFY]
- 1 non-toxic permanent marker (outside surface only) – $2 [VERIFY], or already owned
- 15 to 20 pieces of dry kibble or freeze-dried treats, 8 to 10 mm – already owned
Total: $0 to $10, depending on tools owned.
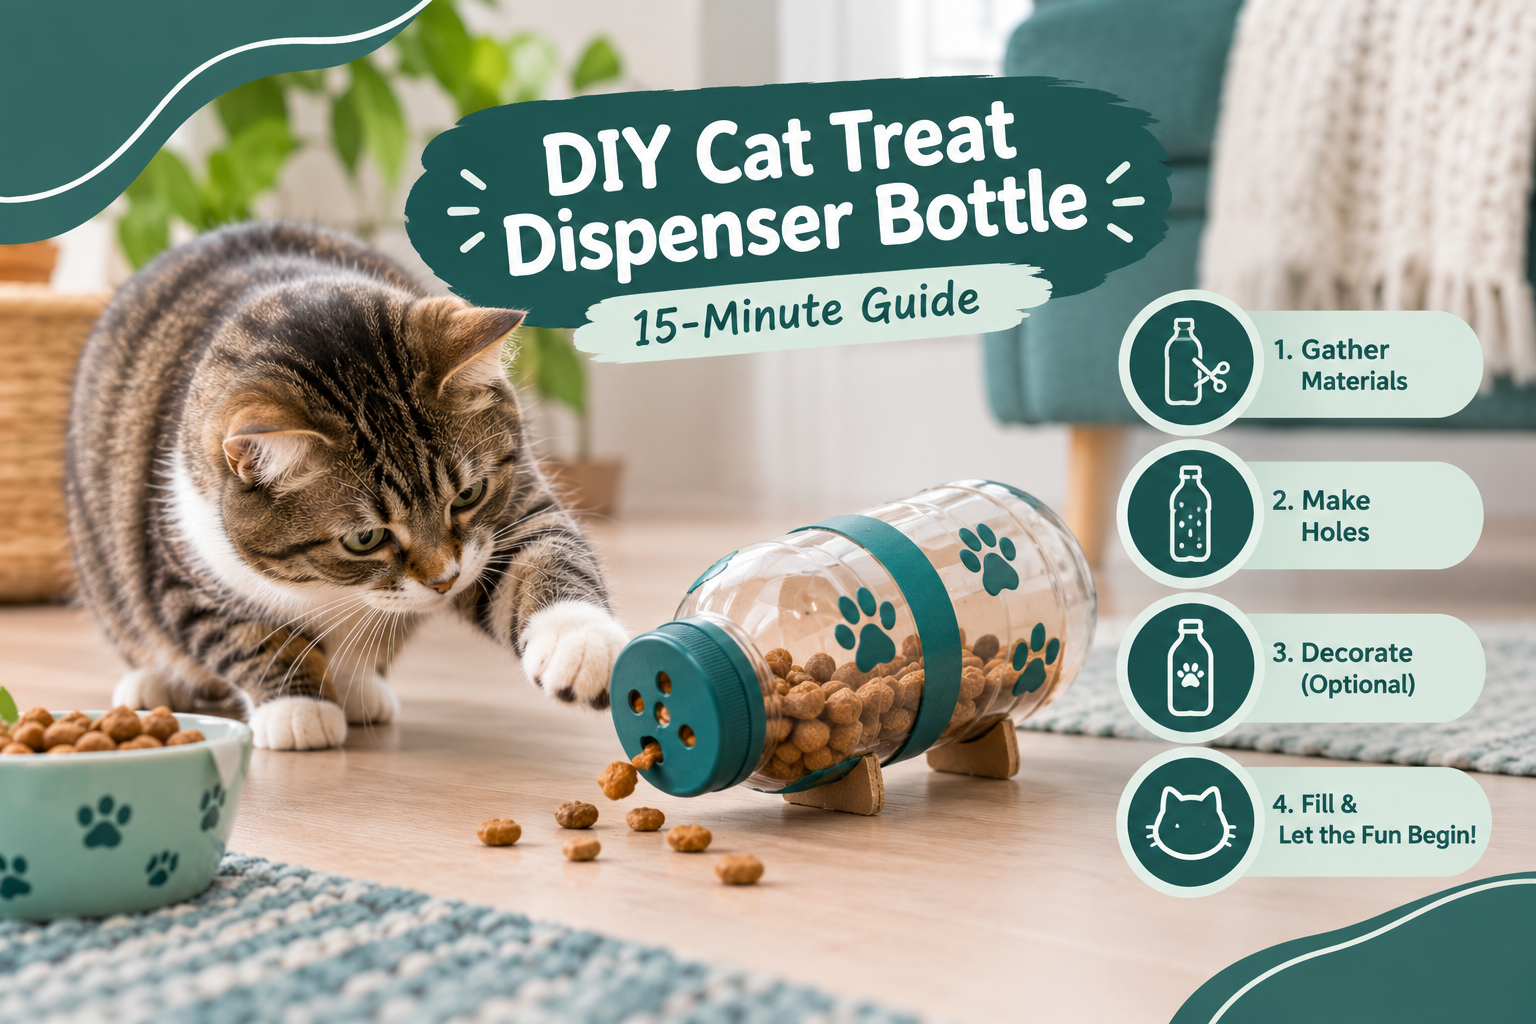
A DIY cat treat dispenser bottle is a clean 500 mL plastic bottle with 3 holes, each 1.3 cm (1/2 in) wide, cut into one side. The cat rolls the bottle across the floor, and kibble drops out through the holes. The build takes 15 minutes and costs $0 to $10, depending on the tools already owned.
Indoor cats finish a bowl of food quickly and spend the rest of the day without a task, a pattern owners observe in cats fed from bowls only. This homemade cat puzzle feeder turns part of the daily meal into work, and it ranks among the cheap cat toys an owner builds from the recycling bin. By the end of this guide, you will build the toy, check it for safety, and run a 3-day routine that teaches an adult indoor cat to use it.
What Materials Do You Need for a DIY Cat Treat Dispenser?
A PET (polyethylene terephthalate) bottle forms the base of this plastic bottle cat toy. PET is rigid enough to roll across a hard floor and thin enough to cut with a craft knife or drill bit. A cat treat dispenser from a water bottle costs $0 to $10 [VERIFY] because recycled household materials replace the purchased parts.
| Tool | Result |
| Drill bit (1.3 cm) | Cleanest edges, requires a drill |
| Craft knife | No power tool needed, rougher edges, 20 seconds of sanding per hole |
The marker is a non-toxic craft supply, and its ink touches only the outside surface, so no ink contacts food. Safety: Craft knives stay away from pets and children. Use only food-grade PET bottles that never held chemicals. A recycled bottle toy of this type needs no other supplies.
How Do You Make a Cat Treat Dispenser From a Plastic Bottle?
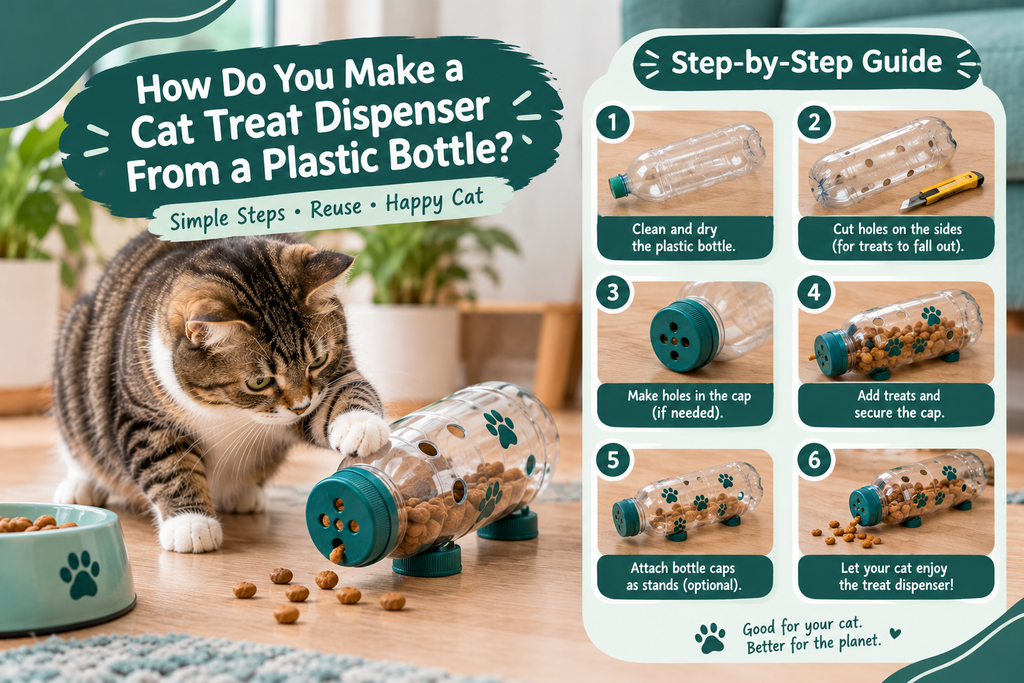
This DIY cat treat dispenser takes 7 steps and 15 minutes. Each step involving a tool or physical risk carries an inline safety note.
- Rinse the bottle and dry it for 5 minutes. Safety: Remove all soap residue.
- Peel the label and wipe off the adhesive. Safety: Leftover adhesive attracts chewing.
- Mark 3 dots with the marker, spaced 5 cm (2 in) apart, starting 5 cm above the base.
- Cut or drill each hole to 1.3 cm (1/2 in). Safety: Cut away from your body on a stable surface.
- Sand each hole edge for 20 seconds with 220-grit paper until smooth. Safety: Run a fingertip around each hole to check for burrs.
- Add 15 to 20 pieces of kibble and leave the cap off. Safety: A removed cap eliminates a choking hazard.
- Roll the bottle once on a hard floor to demonstrate.
The finished bottle treat dispenser works as a DIY puzzle feeder during supervised play time. Discard the toy when any crack, chew mark, or rough edge appears.
How Big Do the Holes Need to Be?
A hole measures about 1.5 times the kibble diameter. A 1.3 cm hole releases 8 to 10 mm kibble roughly every 2 to 3 rolls [VERIFY], and smaller holes jam. This sizing makes the bottle a working kibble dispensing toy instead of a sealed container.
How Do You Smooth Sharp Edges on a Cut Bottle?
Sanding with 220-grit paper is the only edge treatment for cut PET. A flame melts the plastic and releases fumes, so a lighter never touches the holes. Every cat food puzzle made from cut plastic gets the same rule: discard the bottle if any crack runs from a hole.
Test notes: [INSERT: test cat age, breed, and weight] played with the bottle using [INSERT: kibble brand and size]. The first hole size tried was [INSERT: first hole size and result, for example jammed after X rolls], and the final hole produced [INSERT: final hole size and result, for example first piece released after X seconds]. The cat played for [INSERT: duration], and the one surprise was [INSERT: failure or surprise, or delete this clause if none].
Why Do Food Puzzles Work for Indoor Cats?
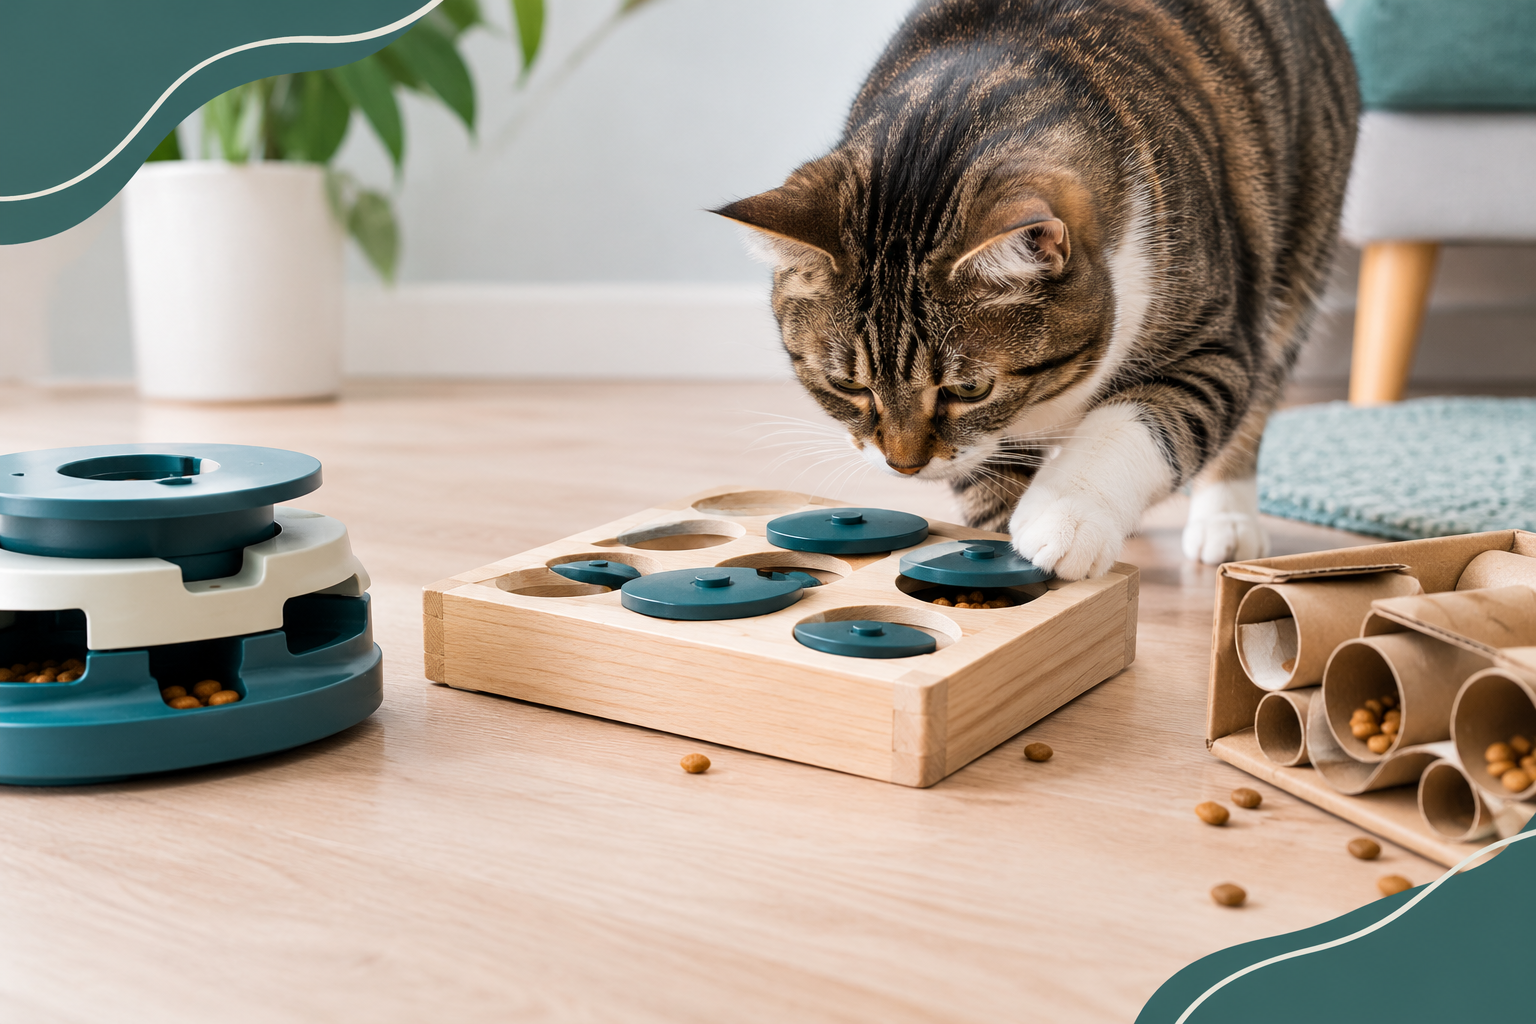
Cats are obligate carnivores, and the predatory sequence of stalk, chase, catch, and eat has no outlet in bowl feeding. Foraging behavior in cats fills part of that gap, because a rolling bottle makes the cat work for each piece of kibble. A cat enrichment toy of this type supplies mental stimulation for cats and targets indoor cat boredom during long solo hours.
The AAFP and ISFM Feline Environmental Needs Guidelines (Ellis et al., 2013, Journal of Feline Medicine and Surgery) present environmental enrichment, including play that mirrors predation, as a core part of indoor feline welfare. The Ohio State University Indoor Pet Initiative lists food puzzles as an enrichment tool for indoor cats [VERIFY wording against both sources]. Indoor cat enrichment built around cat brain games such as this bottle fits both positions.
What Mistakes Do Cat Owners Make With DIY Treat Dispensers?
A slow feeder DIY project fails for 4 predictable reasons. A homemade slow feeder for cats also slows eating pace, which benefits cats that eat too fast.
- Myth: “Any bottle works.” Thick-walled juice and soda bottles resist cutting and crack at the holes, so use a thin 500 mL PET water bottle.
- Mistake: overloading with treats. Treats stay under 10% of daily calories, per veterinary nutrition guidance, including WSAVA materials [VERIFY SOURCE BEFORE PUBLISHING]. Kibble carries a high caloric density per piece, so the 15 to 20 pieces inside come out of the daily kibble allotment, which supports weight management and portion control.
- Myth: “The cat learns instantly.” First-time adult cats often need 2 to 3 sessions.
- Mistake: leaving the dispenser out unsupervised overnight. Chewing is the main risk, so the bottle goes away when the session ends.
How Do You Train a Cat to Use a Treat Dispenser, and Which Cats Skip It?
How to train a cat on this toy takes 3 days with positive reinforcement. Food-motivated cats learn fastest.
- Day 1: Place the dispenser on a hard floor, roll it in front of the cat, and reward the first nudge.
- Day 2: Reduce the demonstration to 1 roll.
- Day 3: Leave the dispenser for 10 minutes of supervised play.
Reward the cat’s approach, not the failure to find kibble. Positive reinforcement ties the bottle to food and keeps the cat engaged when a piece does not drop.
Which Cats Should Skip This Toy?
This is one of the DIY toys for indoor cats that does not suit every cat.
- Kittens under 6 months chew plastic and need constant supervision.
- Cats with dental disease or a history of plastic chewing skip it.
- Cats on veterinary prescription diets use only the prescribed food inside it.
- Senior cats with arthritis get a lighter, easier-rolling version.
Owners of cats with dental, medical, or dietary conditions ask their veterinarian before using the toy.
DIY Bottle Dispenser vs. Store-Bought Interactive Cat Toy: Which Fits Your Cat?
An interactive cat toy from a store costs more but lasts longer, and a bottle build wins on price and adjustability. Cheap cat toys built from a bottle suit owners testing whether a cat likes food puzzles. A store-bought cat feeding toy suits cats that already use them daily.
| Factor | DIY Bottle | Store-Bought Puzzle Feeder |
| Cost | $0 to $10 [VERIFY] | $8 to $25 [VERIFY] |
| Build time | 15 minutes | 0 |
| Durability | Replace every 1 to 2 weeks [VERIFY] | 6 to 12 months [VERIFY] |
| Adjustable difficulty | Yes (hole size) | Limited |
| Dishwasher safe | No | Often yes |
Frequently Asked Questions About DIY Cat Treat Dispensers
Can cats use puzzle feeders?
Healthy adult cats use puzzle feeders, including this bottle version, after 2 to 3 learning sessions. The AAFP and ISFM enrichment guidelines support food-based play for indoor cats. Cats with dental disease or prescription diets need veterinary approval first.
How to make cat toys at home?
Three household-material cat toys work for adult indoor cats: this bottle dispenser (15 minutes), a cardboard tube kibble stuffer (5 minutes [VERIFY]), and a paper bag play tunnel (2 minutes [VERIFY]). Each build uses recycled materials. The full bottle build appears in the step-by-step section above.
Is a plastic bottle safe for cats to play with?
A plastic bottle is safe for adult cats only with the cap removed, every hole edge sanded smooth, and a person supervising the session. Replace the bottle when any crack, chew mark, or rough edge appears. Kittens under 6 months and cats that chew plastic skip this toy.
What treats work best in a homemade dispenser?
Dry kibble or freeze-dried treats measuring 8 to 10 mm work best in a kibble dispensing toy like this one. Soft, sticky, and wet foods clog the 1.3 cm holes. Treats stay under 10% of daily calories under veterinary nutrition guidance [VERIFY SOURCE BEFORE PUBLISHING].
How often should I let my cat use the dispenser?
A slow feeder DIY toy like this bottle runs 1 to 2 supervised sessions daily, 10 to 15 minutes each. Subtract the kibble inside from the cat’s daily meal calories, so the toy adds no extra food. Split sessions between morning and evening to spread foraging across the day.
Conclusion
A 1.3 cm hole is the difference between a dispenser that works and one that jams. Cut to that size, sanded smooth, and filled with 8 to 10 mm kibble, the bottle releases food on a predictable rhythm.
The finished toy is a $0 to $10 [VERIFY] build that converts mealtime into 10 to 15 minutes of daily foraging for a healthy adult indoor cat. Sanded edges, a removed cap, and supervised sessions keep the build safe, and the 3-day routine teaches the behavior. Replace the bottle every 1 to 2 weeks [VERIFY] or at the first crack. Post your cat’s time to the first dropped kibble in the comments, and tell us which hole size worked.